1.
6 Most Used NDT Crack Detection Methods
1.1.
Ultrasonic Crack Detection
1.2.
EMAT Crack Detection
1.3.
Eddy Current Crack Detection
1.4.
Thermography Crack Detection
1.5.
Magnetic Particle Testing
1.6.
Acoustic Emission Testing
2.
Conclusion
1.
6 Most Used NDT Crack Detection Methods
1.1.
Ultrasonic Crack Detection
1.2.
EMAT Crack Detection
1.3.
Eddy Current Crack Detection
1.4.
Thermography Crack Detection
1.5.
Magnetic Particle Testing
1.6.
Acoustic Emission Testing
2.
Conclusion
Non-destructive testing (NDT) includes different techniques for assessing material quality characteristics like density, hardness, or thermal conductivity, without damaging them. The goal is to evaluate the assets’ durability and detect defects like cracks, inclusions, or cavities at the onset.
Left unaddressed, cracking can have devastating consequences. A crack in a storage tank can have devastating consequences like ethanol spills leading to major contamination or crude oil spills during transportation. Such incidents cause substantial financial, environmental, and regulatory damage to asset owners.
Periodical NDT testing helps detect early signs of crack development on the surface and just below it.
Depending on the use case and material type, there are dozens of different crack testing techniques inspectors can apply. However, the following six are most commonly used for industrial asset inspection scenarios.
Ultrasonic testing is one of the widely used NDT methods for detecting sub-surface and surface-level cracks with high precision. By tracking and timing ultrasonic pulses penetrating the test object, you can detect thickness loss, voids, inclusions, corrosion, and other irregularities that may cause fatigue cracks later on. Equally, ultrasonic testing is effective for finding tiny surface cracks, invisible to the naked eye.
Modern NDT equipment allows you to collect A-scan, B-scan, and C-scan ultrasonic data.
| Scan Type | Description | Most Useful For |
| Amplitude scan (A-scan) | 1D plot showing amplitude vs. depth of ultrasonic echo signals for a specific point. Indicates the size and location of thickness losses or flaws | Thickness measurements Single-location flaw/crack sizing |
| Brightness scan (B-scan) | 2D cross-sectional view showing the side view of the material’s depth along a scan line. Represents the internal structure of the material | Corrosion mapping Weld inspection Localization of cracks in tested cross-section |
| Color/Contour Scan (C-scan) | 2D top-down snapshot of the material’s condition over a scanned area. Color or intensity indicates flaw size or depth. | Large-area corrosion mapping Composite material evaluation |
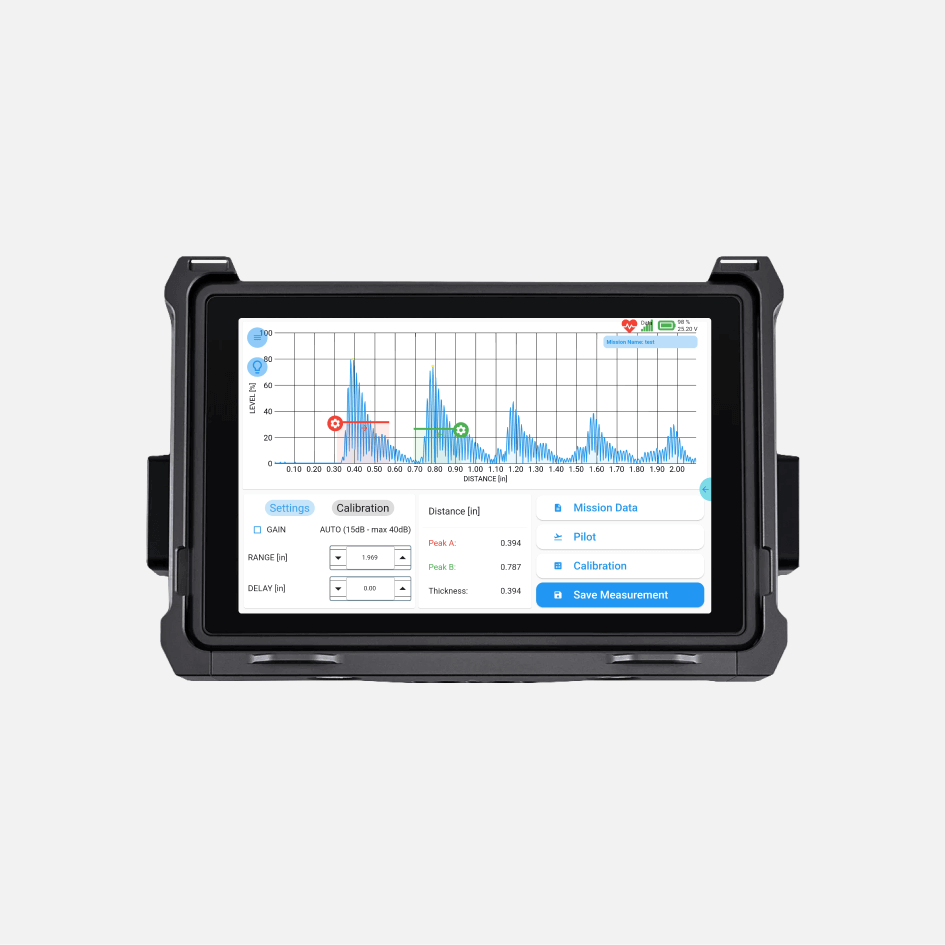
A-scans are most widely used in industrial inspections as they allow preemptive action.Corrosion, erosion, and wear weaken the structural integrity of an asset over time. A-scans help evaluate thickness loss at the early stage in assets subjected to mechanical stress or a corrosive environment before the cracks start forming.
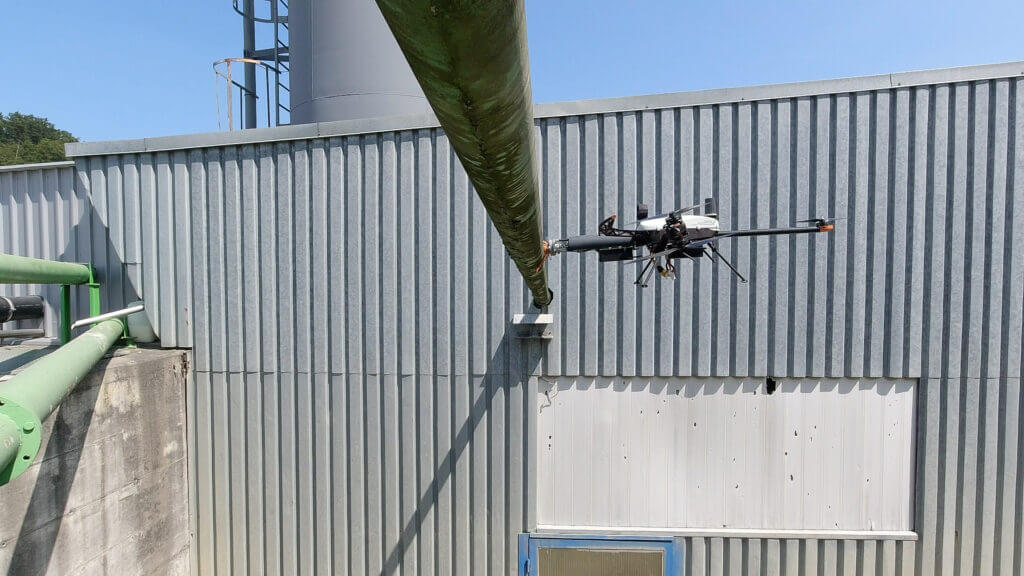
For example, with the Voliro UT drone payload, inspectors can perform live A-Scans at a thickness range of 2-150 mm with a resolution of 0.06 mm. The drone’s 360-degree mobility allows operators to easily scan large industrial assets with complex geometries (e.g., flare stacks, aboveground piping, offshore rig components) without commissioning expensive lifting equipment.
With our technology, inspection crews can collect up to 120 thickness measurements per hour, even in hard-to-reach locations, ensuring that no early signs of fatigue, corrosion, or erosion will lead to cracking.
An electromagnetic acoustic transducer (EMAT) is another frequently employed tool for thickness measurement and crack inspection. Similar to UT gauges, EMAT models can perform A-, B-, and C-scans to provide the same inspection data.
The difference between EMAT and UT is that the former is a non-contact inspection method. With EMAT, you don’t need to use a coupling medium, such as water or gel, to prepare the surface for scanning because ultrasound waves are generated directly through electromagnetic induction. This means EMAT can penetrate through protective coatings to assess the surfaces beneath it or be used on rough surfaces.
However, the object’s conductivity and magnetic properties will play a role in the signal quality. For instance, EMAT A-scans may have a lower signal amplitude compared to UT piezoelectric transducers. Although, this depends a lot on the EMAT gauge type and selected settings.
For example, Voliro’s EMAT drone-mounted gauge has the same measurement range as our UT payload of 2-150 mm with a resolution of 0.06 mm. To put the numbers in context, inspection crews can collect 50-100 thickness readings per hour on elevated piping using our inspection drone and EMAT payload.
Because EMAT works on hot, rough, and coated surfaces, operators no longer need to engage in lengthy pre-inspection preparation (e.g., fill gas pipes with liquid for better conductivity). Using an inspection drone also eliminates the need to commission extra lifting equipment or build scaffolding, which further prolongs downtime and drives inspection costs.
Eddy current testing is the go-to method for surface-level crack detection in conductive materials like stainless steel, aluminum, and copper among others. Based on principles of electromagnetic induction, EDT tools produce an oscillating magnetic field on the test surface, inducing a circular electric current (eddy current) in the material.
Cracks disrupt the flow of eddy currents, causing changes in the impedance of the coil. The tool interprets the magnitude and phase of signal deviations to indicate the crack’s size, depth, and orientation. The resulting accuracy depends on the object’s electrical conductivity characteristics, magnetic permeability, and the selected tool frequency. Low frequency ensures higher penetration depth but at the cost of decreased sensitivity and vice versa. Although newer tools compensate for these deficiencies. For example, EddyFi Sharck probes rely on tangential eddy current array technology (TECA) — a multiplexed topology of tangential and pancake coils — that allows greater signal quality. Sharck probes can detect cracks in carbon steel assets at a max depth of 7 mm (0.28 in) and measure their length with high precision.
Generally, eddy current testing is used to detect:
Similar to EMAT, eddy current testing is a no-contact and no-couplant crack testing method. Still, the probe has to be positioned at a small distance to achieve a higher defect resolution. To detect cracks that are parallel to the eddy current flow, you’ll also need to reorient the probe, meaning that you need a tool with good maneuverability.
Apart from surface-level crack inspection, eddy current testing can be also used for detecting corrosion under insulation (CUI) — a common cause for crack initiation and propagation in assets like insulated pipes, storage tanks, and heat exchange vessels.
CUI is challenging to detect since you don’t have direct visibility into its development. Prolonged exposure leads to the metal thickness loss, compromising the asset’s structural integrity, leading to deformation and, eventually, cracking.
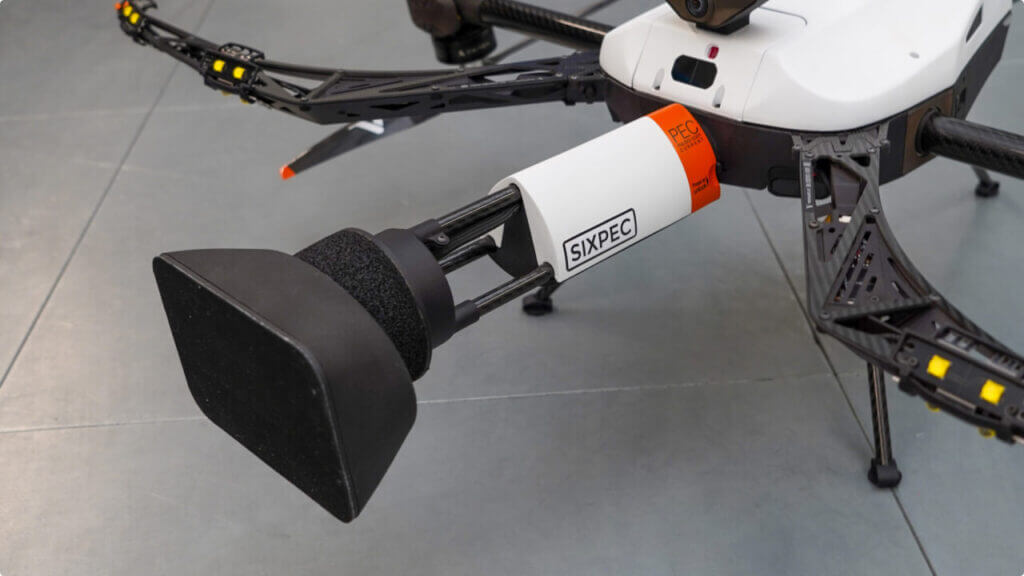
For such scenarios, Voliro is preparing to release a pulsed eddy current (PEC) payload in Q4 2024. By combining Voliro’s inspection drone with a second-generation Sixpec® eddy current module, we bring efficient, and accurate CUI inspections to new heights, literally. During tests at the Tupras refinery, our tool successfully detected early-stage CUI with up to 100 mm of insulation thickness in process pipes, enabling preventive asset conditioning practices.
Industrial thermography helps confirm the presence of defects like cracks or voids through analysis of the object’s temperature signatures.
Thermal cameras capture the differences in infrared radiation and surface temperature distribution, indicative of underlying structural issues like cracks or voids. Depending on the asset type, these defects can appear in cooler or warmer areas. Thermal scans can be helpful for issue localization in large industrial complexes.
For example, oil and gas companies use thermal drones to survey miles of above-ground pipelines for signs of leaks. Likewise, drones can assist with crack detection in heat exchanger tubes, smokestacks, and large pressure vessels, keeping personnel out of hazardous areas.
California Resources Corp (CRS) was one of the first companies to implement a successful drone asset inspection program at its operating sites, spanning over 2.2 million net acres. In particular, the team uses thermal detection drones to monitor for methane or hydrogen sulfide leaks, ground subsidence of well pads, and flare stack anomalies.
Conventional inspection methods like chartered helicopter flights and foot patrols were costly and impractical. By using drones to capture thermal imagery, CRC can detect structural issues early on, allowing personnel to act on that information faster. The company managed to reduce all inspection workflows by 40% and got six-figure savings in the first 6 months of drone program deployment.
Captured thermal data can be further analyzed with software that helps estimate the size and depth of cracks based on the captured temperature profiles and thermal gradients, saving maintenance teams time on field trips.
Researchers from New York City University, for example, trained an AI algorithm on near-IR fluorescence imaging to identify cracks in concrete with widths of 0.2–1.5 mm with high precision. A team from South Korea, in turn, proposed a deep learning algorithm for automating crack detection in the power plant industry, using drone-captured thermal footage.
Magnetic particle testing is a common NDT practice for crack detection in ferromagnetic assets made of steel and iron. By sending a direct or alternating current through the test object, covered with dry or wet magnetic particles, you can detect the exact location of a crack or another type of delamination close to the surface. The particles will accumulate at the defect area, indicating their size and shape.
Because of its high sensitivity, MPT is great at detecting fine surface-level cracking. However, its depth detection range is limited. Access to the object surface and its extensive prep is also required, which may be a hindrance for assets in use. For example, you’ll need to empty and clean a tested pipe to run the test. You’ll also need to demagnetize the parts after the test.
Arguably, the most challenging part of MPT is result interpretation. Finer cracks on smaller objects may be hard for an inspector to detect with the naked eye. Defect severity is also determined by the inspectors’ judgment — and result interpretation may vary from one person to another.
To obtain more objective assessments, some teams are experimenting with automated crack detection approaches. A research group from China evaluated how different deep learning algorithms perform in crack detection on train rivets, covered in fluorescent magnetic particles. The best model performed with 90.1%, which is substantially higher than the baseline.
Acoustic emission testing is one of the few effective methods for identifying the presence of fatigue cracks inside the test objects at the earliest stages. Left undetected, deep cracks and microstructural changes can cause sudden asset failures, posing both human and environmental risks.
High-frequency AE sensors, operating at the range of 50 kHz to 1 MHz, help detect acoustic emissions, caused by internal crack growth, dislocation movements, or fiber breakage inside the structure.
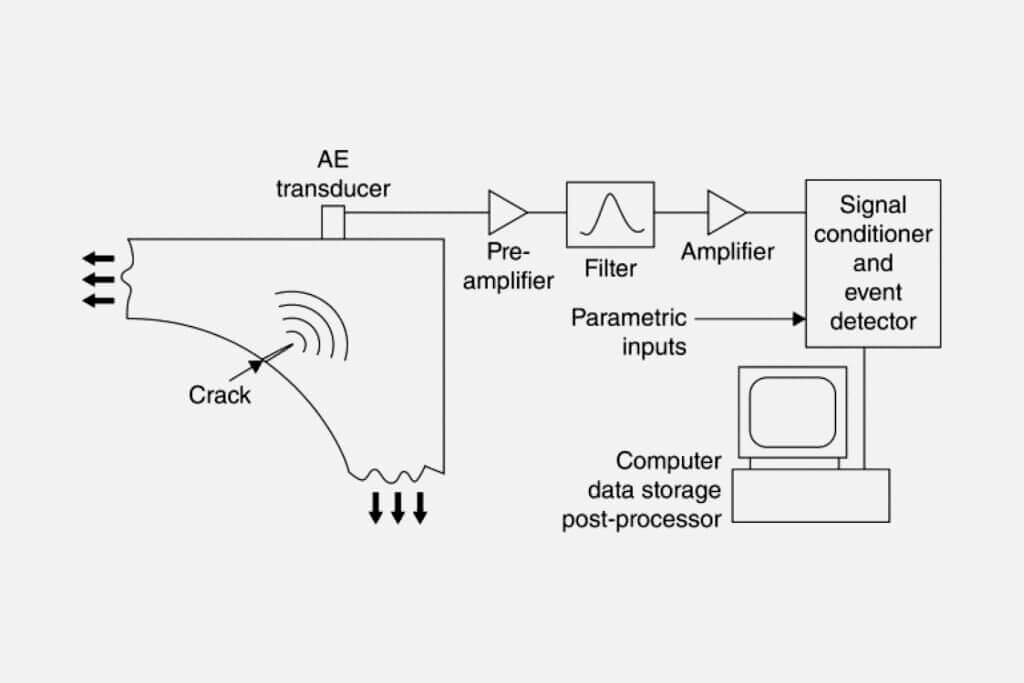
The test can be performed either on an in-use asset to evaluate its current performance under existing loads. For example, an AE test can detect if current configurations like internal pressure and programmed cyclic loads contribute to excessive stress of a pressure vessel. Or AE can be used in concrete testing to ensure that large structures like bridges or dams remain intact.
AET can be also used to assess how the asset performs when subject to higher than-usual stress e.g., higher external loads or high-temperature exposure. For example, AE data from uniform cyclic loading tests on an aluminum alloy pipe can indicate its susceptibility to cracking under certain conditions.
Compared to other NDT methods, acoustic emission testing ensures crack detection on the earliest stage — initiation. AE sensors can be also configured to continuously send signal data to analytics software for ongoing monitoring.
On the downside, background noise like operational vibrations can hinder signal accuracy. AE signal data interpretation is also complex. It requires both human expertise and top analytics models for accurate defect identification and characterization.
Failure to address cracks leads to a number of safety-critical scenarios and substantial economic costs. Yet, many teams delay inspections because of the testing process complexities — asset shutdown, personnel coordination, and extra equipment commissioning on site. Voliro’s inspection drone eliminates a lot of these inherent inefficiencies from the process. Because you don’t need to arrange for extra equipment or coordinate schedules for asset shutdown, the inspection times can be 90% faster, and inspection costs — 30% lower.